Harley Trailer Wiring: Plug-and-Play Harnesses for Tri Glide & Freewheeler
Posted by The USA Trailer on Mar 24th 2026
If you own a Harley Tri Glide or Freewheeler and want to expand your touring range with a trailer, you need reliable trailer lighting that works seamlessly with your trike’s electronics. That’s exactly what our plug-and-play 4-wire trailer wiring harnesses deliver, providing safe and simple installation without cutting factory wires.
Key Takeaways
- Harley Tri Glide and Freewheeler owners can tow safely using our plug-and-play 4-wire trailer wiring harnesses, designed specifically for 2014-present Harley trikes without any wire splicing or cutting.
- Two different harnesses exist and are NOT interchangeable: the 10-2600 fits 2014-present Tri Glide -models (FLHTCUTG), while the 10-2599 fits 2014-present Freewheeler FLRT and 2023-present Road Glide 3 FLTRT.
- Both harnesses protect your bike’s CAN-bus electronics through relay isolation and are fully bench-tested at The USA Trailer Store before shipping to ensure proper function.
- Each kit includes a flat-4 trailer connector and a simple LED tester so you can confirm your bike wiring is working correctly in minutes, separating bike issues from trailer issues instantly.
- A 1-year limited warranty covers manufacturing defects, though competent installation by someone comfortable with motorcycle electrical work, or a trained mechanic is strongly recommended.
Harley Tri Glide Touring & Towing Overview
The Harley Davidson Tri Glide and Freewheeler represent the pinnacle of three-wheeled touring comfort. Powered by the high-output Milwaukee-Eight V-Twin engine, delivering massive low-end torque through a 6-speed Cruise Drive transmission, these trikes are built for long-distance cruising with a rider, passenger, and serious luggage capacity.
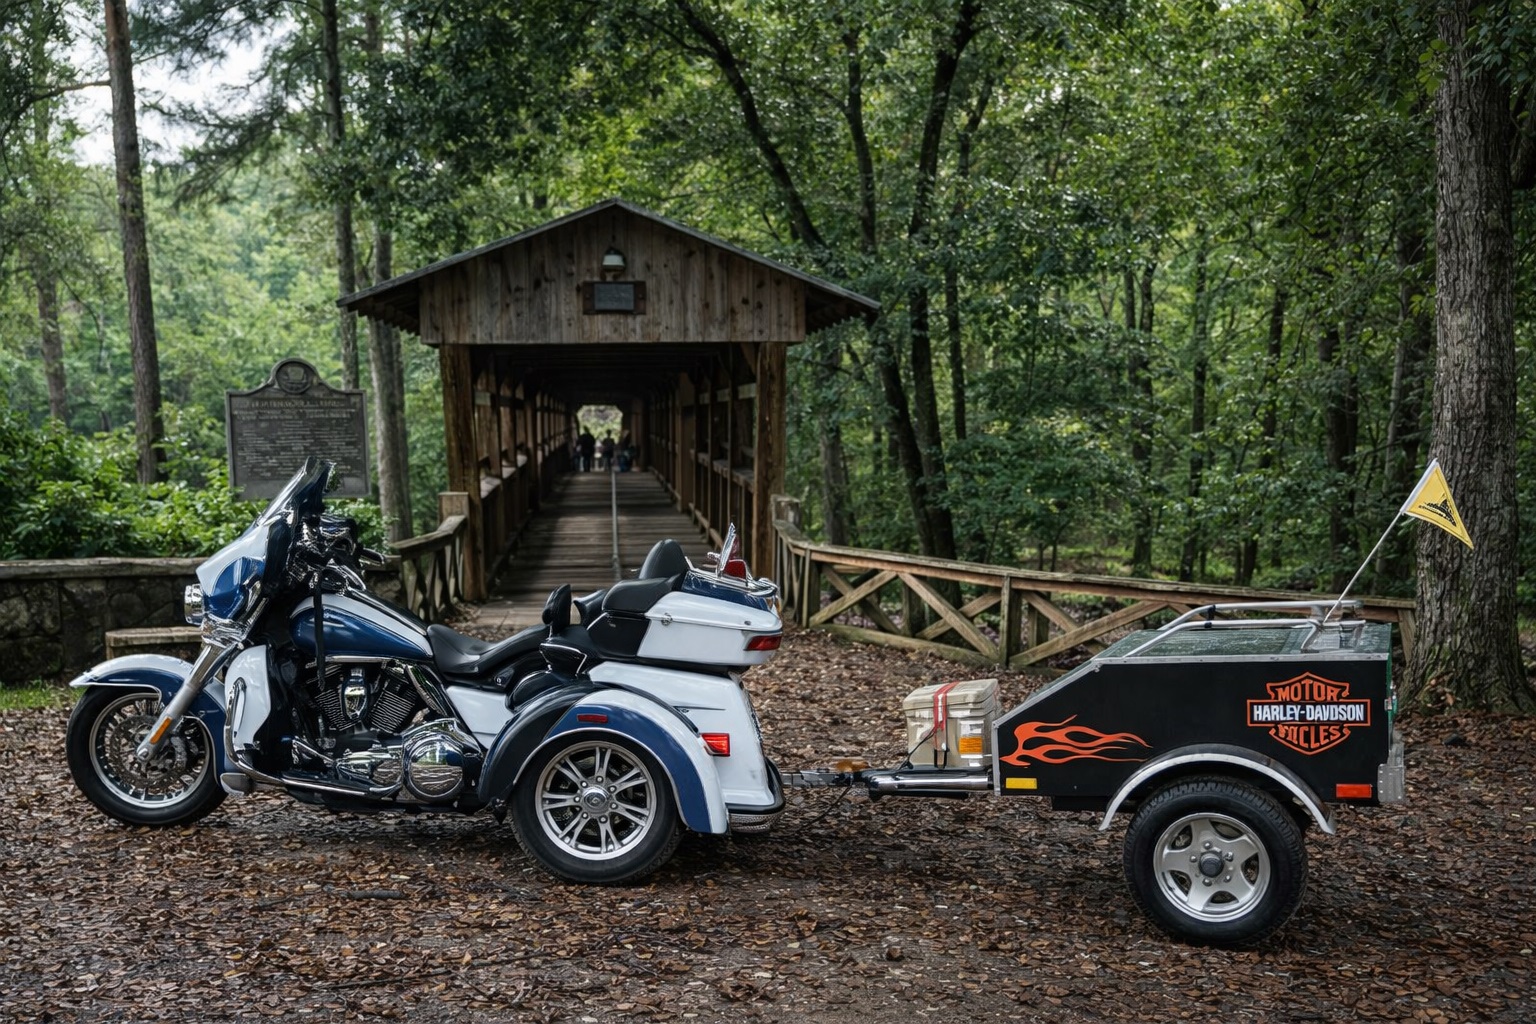
Many Tri Glide and Freewheeler owners eventually add a trailer, whether a camping trailer, cargo pod, or small utility trailer, along with a Harley trike trailer hitch to extend storage space beyond the stock trunk and Tour-Pak. With running weights ranging from approximately 1,100 to over 1,200 pounds and a 6-gallon fuel tank designed for long-range touring, these trikes have the chassis stability and power to handle light towing duties on cross-country tours.
While your trike may come equipped with impressive factory technology, ranging from the standard Boom Box infotainment systems to the latest GTS touchscreens, alongside advanced rider safety enhancements like Electronic Linked Braking, it does not leave the factory with a flat-4 trailer plug. A dedicated trailer wiring harness is required to legally and safely connect trailer lights.
A purpose-built plug-and-play harness is significantly safer than DIY splicing into your Tri Glide’s CAN-bus system or randomly tapping wires in the rear fender harness. This article focuses on our plug-and-play 4-wire trailer wiring harnesses specifically engineered for 2014-present Harley Davidson trikes.
Why a Plug-and-Play Harness for Your Harley Tri Glide?
Homemade splice-in kits and universal trailer wiring adapters might seem like budget-friendly options, but they carry real risks. Overloading the factory lighting circuits on a modern Harley Tri Glide can trigger fault codes, damage the body control module, or cause intermittent electrical gremlins that are expensive to diagnose.
Here’s what our plug-and-play harnesses offer instead:
- No cutting factory wires – Your bike’s electrical system remains untouched and dealer-serviceable
- No guessing on wire colors – Model-specific connectors eliminate installation errors
- No warranty headaches – Non-invasive installation reduces the risk of dealer disputes over hacked wiring
- Relay-isolated power – The trailer lights draw directly from the battery through a 15A inline fuse, not from your trike’s lighting circuits
The harness converts your Tri Glide’s signals into a standard 4-wire flat trailer output: green for right turn/brake, yellow for left turn/brake, brown for running lights, and white for ground. This system works with small 4-wire cargo and camping trailers commonly towed behind Harley trikes.
Tri Glide vs. Freewheeler / Road Glide 3: Picking the Correct Harness
The Harley-Davidson Tri Glide and Freewheeler/Road Glide 3 use different factory rear fender harness connectors, which are accessed under the seat. Because these connectors differ between trike models, they require specific plug-and-play harness part numbers. Using the wrong harness will not work and could potentially damage connectors.
Tri Glide Fitment (Part 10-2600):
- Fits: 2014–Present Tri Glide (FLHTCUTG).
- Exclusions: Will NOT work on Freewheeler (FLRT) or Road Glide 3 (FLTRT) models.
- The Connector System: While the Tri Glide features both an 8-pin gray and a 6-pin black connector under the seat, this harness is specifically engineered to plug into the 6-pin black connector.
- Installation Note: To ensure a proper "Plug-and-Play" connection, installers should locate the 6-pin black connector (typically found closer to the rear fender) rather than the more visible 8-pin gray connector.
Freewheeler / Road Glide 3 Fitment (Part 10-2599):
- Fits: 2014–present Freewheeler (FLRT) and 2023–present Road Glide 3 (FLTRT).
- Exclusions: Explicitly EXCLUDES all Tri Glide models.
- The Connector: This harness utilizes a gray 8-pin connector system.
- Technical Note: Unlike the Tri Glide's 6-pin setup, the Freewheeler and Road Glide 3 architecture requires this specific 8-pin relay configuration to properly isolate the trailer lights from the bike's BCM.
|
Model |
Years |
Part Number |
Exclusions |
|
Tri Glide (FLHTCUTG) |
2014-Present |
10-2600 |
Freewheeler, Road Glide 3 |
|
Freewheeler (FLRT) |
2014-Present |
10-2599 |
All Tri Glide Ultra models |
|
Road Glide 3 (FLTRT) |
2023-Present |
10-2599 |
All Tri Glide Ultra models |
Before ordering, confirm your year and model designation. You can find detailed fitment tables on our product page.
Plug-and-Play Harness for 2014–Present Tri Glide Ultra (10-2600)
This 4-wire, relay-based, plug-and-play trailer wiring solution is engineered specifically for 2014-present Harley Davidson Tri Glide models. The design eliminates guesswork and protects your trike’s sophisticated electronics.
The Tri Glide has two rear harness connectors. Under the seat you will find an 8-pin gray connector and a 6-pin black connector. If you locate the gray 8-pin connector first, continue searching. The black 6-pin is farther back and under the tour pack.
Kit Contents:
- 4-wire relay module
- 4-pin trailer plug harness with flat-4 connector
- Inline blade fuse holder
- 15A blade fuse
- Ground wire with ring terminal
- Ring terminals
- LED circuit tester
This harness requires two crimp connections. First, crimp the relay’s red power lead using the blue ring connector and attach it directly to the positive battery terminal. Next, crimp the relay’s black ground lead using the blue ring connector and attach it directly to the negative battery terminal.
Plug-and-Play Harness for 2014–Present Freewheeler & 2023–Present Road Glide 3 (10-2599)
This harness provides the same 4-wire trailer lighting output but is wired differently to match the Freewheeler FLRT and Road Glide 3 FLTRT factory connectors and battery layout.
Important: This kit does NOT fit any Tri Glide Ultra models. It is intended only for 2014-present Freewheeler FLRT and 2023-present Road Glide 3 FLTRT.
Kit Contents:
- 4-wire relay module
- 4-pin trailer plug harness
- Inline blade fuse holder
- Blue butt connector
- Ring terminal
- 15A blade fuse
- LED circuit tester
This harness requires making two crimp connections: the relay’s red power lead is joined to one end of the inline fuse holder using the included blue butt connector, then the fused lead attaches directly to the positive battery terminal. The detachable red wire is the brake signal. Some Freewheeler models use a 5-wire system, while others use a 4-wire system, so this connection may not always be needed.
If your bike does not have a separate brake signal, disconnect the red wire before testing with the LED tester, then retest to ensure proper function.
Step-by-Step Installation Overview (Both Harness Types)
⚠️ WARNING: Read the full instructions that ship with your harness before beginning. If you are not comfortable with motorcycle electrical work, seek assistance from a trained mechanic. Failure to follow safety procedures can result in damage to your motorcycle, serious injury, or death.
Common Installation Steps:
- Remove the seat,
- Remove the main fuse before touching any wiring—failure to do so could result in unexpected engine ignition
- Locate the two bolts holding the ECM and top caddy in position
- Remove the bolts and lift the ECM assembly to access the battery
- Disconnect the negative battery cable first to prevent accidental ignition and sparks
- Disconnect the positive battery cable
- Install ring terminals for power and ground connections
- Reattach positive cable first, then negative cable last
Torque Specifications: | Component | Torque Value | |———–|————–| | Battery terminals | 60-70 in-lb (6.8-7.9 Nm) | | ECM/top caddy bolts | 72-96 in-lb (8.1-10.9 Nm) |
Recommended tools include a torque wrench, ratchet set, screwdrivers, and a multi-function wire tool for stripping and crimping.
Electrical Connections: Power, Ground, and Relay Module
Both harnesses use a relay module powered directly from the battery through an inline fuse. This design isolates trailer load from the factory lighting system, protecting your trike’s electronics and providing confidence when towing.
For Tri Glide Harness (10-2600):
- Strip the ends of the fuse holder and ground wires
- Attach the inline blade fuse holder’s ring terminal to the positive (+) battery post
- Attach the ground wire’s ring terminal to the negative (–) battery post
- Reinstall factory cables with proper torque (positive first, negative last)
For Freewheeler / Road Glide 3 Harness (10-2599):
- Strip the ends of the inline fuse holder wires
- Crimp the blue butt connector on one end of the fuse holder wire
- Crimp the ring terminal on the other end
- Extend the relay module’s red wire and insert it into the butt connector
- Crimp securely and attach the ring terminal to the positive battery post
Important: Insert the 15A blade fuse into the inline holder only after all wiring is complete and the main fuse has been reinstalled, just before testing the system.
Position the 4-wire relay module under the seat or side cover where it’s protected from water, road debris, and accidental impact. Secure it using the included 3M adhesive pad, cable ties, or self-tapping screw.
Connecting to the Rear Fender Harness & Routing the Trailer Plug
The plug-and-play design works by inserting the relay module inline between the factory male and female connectors feeding the rear fender lighting harness. This preserves the factory wiring path while adding trailer functionality.
Connection Steps:
- Separate the OEM rear fender harness connectors (male and female)
- Plug the relay module’s male end into the bike’s female connector
- Plug the relay module’s female end into the bike’s male connector
- Connect the 4-pin trailer plug harness to the relay module
- Route the harness under the rear fender toward the hitch area
⚠️ WARNING: The harness MUST be secured using the included 3M adhesive pad, cable ties, or self-tapping screw. Check clearance through full suspension travel to avoid chafing, pinching, or catastrophic failure. Make sure the harness is clear of the rear suspension and wheels.
The flat-4 connector should end up in an accessible, protected location near the hitch where you can easily connect or disconnect the trailer loom. The wire colors and functions follow standard trailer wiring:
|
Wire Color |
Function |
|
Green |
Right turn indicator/brake light |
|
Yellow |
Left turn indicator/brake light |
|
Brown |
Running lights |
|
White |
Ground |
Using the Included LED Tester to Confirm Proper Operation
Every harness from The USA Trailer Store ships with a plug-in LED tester that simulates a trailer’s lighting system. This allows you to confirm the harness is working correctly before connecting your actual trailer, helping you accurately isolate whether a lighting issue exists within the motorcycle's power source or the trailer's own wiring.
How to Test:
- Connect the LED tester to the flat-4 trailer plug
- Turn on the motorcycle’s ignition
- Test each function:
|
Bike Control |
Tester Response |
|
Left turn signal |
LT (center) LED illuminates |
|
Right turn signal |
RT (right) LED illuminates |
|
Brake lever pulled |
Both LT and RT LEDs illuminate |
|
Running lights/headlights on |
TAIL (left) LED illuminates |
If the tester behaves correctly but your trailer does not, the problem is with the trailer wiring—or an attempt to use a 4-wire harness on a 5-wire trailer. The plug-and-play harness has been bench-tested and verified before shipping.
Keep the tester in your saddlebag or luggage space as a quick diagnostic tool on trips. It requires no helper and works anywhere you can safely park the trike.
Safety Warnings, Maintenance & Warranty
Towing with a Harley Tri Glide, Freewheeler, or Road Glide 3 should always be approached with caution. Follow Harley-Davidson’s own guidelines and local country regulation regarding trailers and maximum loads.
Critical Safety Warnings:
- Use of a trailer may increase your chances of injury in an accident situation
- Installation should only be executed by individuals competent in electrical work—seek assistance from a trained mechanic if unsure
- Failure to remove the main fuse before working could result in unexpected engine ignition
- Always disconnect the negative battery cable first to prevent accidental sparks
- Ensure the harness is clear of rear suspension and wheel travel at all times
Maintenance Responsibilities: It is the rider’s responsibility to regularly inspect all fasteners, cable ties, and wiring runs. Vibration and road debris can loosen connections or wear through insulation over time. Lost parts due to inadequate connections are not covered by warranty.
1-Year Limited Warranty Details:
- Covers manufacturing defects only
- Extends to the original owner only
- Does not cover normal wear and tear
- Products showing signs of neglect or abuse void the warranty
- Requires proof of purchase and pre-paid shipping of the complete unit back to The USA Trailer Store
All returns require a return authorization number
Where to Buy & Product Links
You can order your plug-and-play trailer wiring harness directly from The USA Trailer Store. Make sure to select the correct harness for your specific vehicle model.
Purchase Options:
- Main Product Page: Plug & Play Trailer Wiring Harness for Harley Trike
All harnesses are fully bench-tested before shipping and backed by our support team should installation or operation questions arise. Have your Harley model and year ready when contacting us. We can provide general guidance, but fitment is the customer’s responsibility and must be verified using the information on each product page.
Whether you’re loading up for a cross-country ride with extra luggage capacity or just need to haul camping gear to your local dealer’s rally, the right plug-and-play harness gives you the confidence to tow safely without compromising your trike’s sophisticated electronics.
FAQs
Q: Can I use a 4-wire plug-and-play harness with a 5-wire trailer on my Tri Glide?
A: Our harnesses are designed for standard 4-wire trailer systems where brake and turn signals share the same filament. A 5-wire trailer separates brake and turn functions and requires either re-wiring the trailer to a 4-wire configuration or adding a separate 4 to 5 wire converter. If the LED tester shows proper function but your 5-wire trailer behaves incorrectly, the issue is with trailer configuration, not the plug-and-play harness. Consult a trailer electrician or convert your trailer to a 4-wire layout.
Q: Will installing this harness void my Harley-Davidson warranty?
A: Our harness is designed to be non-invasive and plug-and-play, avoiding cutting or splicing of factory wires. This approach significantly reduces the risk of warranty disputes compared to DIY splice-in solutions. However, final decisions about warranty coverage rest with Harley Davidson and your servicing dealer. If you’re concerned, discuss any modifications with your local dealer before installation. The relay design isolates trailer load from the bike’s electronics, which is generally more warranty-friendly than tapping into factory lighting circuits.
Q: Can I install the harness myself, or do I need a dealer or mechanic?
A: Experienced DIY riders with basic tools, wrench, ratchet set, screwdrivers, and wire stripper/crimper, can usually complete installation in an afternoon by following the printed instructions carefully. However, anyone uncomfortable with motorcycle electrical work or with removing seats and ECM caddies should hire a qualified mechanic. Improper installation (reversed polarity, unsecured wiring, pinched cables) can damage the bike or trailer and is not covered under warranty.
Q: How often should I inspect the trailer wiring on my Harley Tri Glide?
A: Perform a quick visual inspection before every long ride: check that the flat-4 connector is clean and secure and verify that cable ties are intact. At least a few times per riding season, conduct a more thorough inspection to confirm the harness is still clear of the tire and suspension with no worn or chafed insulation. Use the included LED tester periodically, even when no issues are suspected, to catch problems early and ensure reliable lighting performance. Applying dielectric grease to all connectors, including the bike’s plug-and-play connections and the trailer 4-pin plug, will help prevent corrosion and maintain long-term functionality.
Q: Does towing a trailer affect how my Tri Glide or Freewheeler handles and brakes?
A: Any trailer, no matter how light, will change acceleration, braking distance, and cornering behavior, especially on wet or uneven surfaces. The added weight affects stability and ground clearance dynamics. Practice with a loaded trailer in an empty parking lot or quiet road before embarking on long trips, paying close attention to stopping distances and low-speed maneuvering. The enhanced electronic linked braking and traction aids on your trike help, but they cannot eliminate the physics of added trailer mass.